Tuesday, December 31, 2013

Making a New Years Hat & Learning About the Calendar

My mom was encouraging me to take our toddler to the Children's Museum, because they have a "noon" celebration for kids to learn about New Years, and even though we weren't up for going out, she did give me the idea that I could do a project at home, and what would be better than a New Years hat he could wear all day?!


Before getting started, we talked about what a year is. I don't expect a toddler to be able to understand everything about a calendar, but make it a practice to include him in everything I can in life, and New Years is a big part of life and is about ending a year and starting a new one, so that's what we talked about. We also talked about it being a celebration and saying "Happy New Year," which he caught on to really fast, especially coming off the tail feathers of saying "Happy Halloween" and "Merry Christmas." He thought it was great to have another exciting saying!

To make a top hat, you can look up instructions on the Internet. You can look up how to make almost anything on the Internet. Here are the instructions I referenced: http://childrensart.info/paper-top-hats/. You basically cut out the pieces and let your toddler decorate them; the options are endless.

We had some numbers and letters that my brother and sister-in-law got him for Christmas, that we used as a learning opportunity by asking our toddler to find the  numbers 2-0-1-4 and the letters of his name in the pile of letters, which you can see made it on to the hat. 

My mother-in-law did this activity with my little one, and we both cut our shapes he could glue on the hat. Again, you get to be very involved in doing crafts with toddlers, so have fun! We also used glitter paint, and I added some of the tensile embellishment myself to the top.

The only challenge we ran into is that he was so excited to put a hat on, that he kept putting the pieces of it on, before I had constructed it, so in the end, I raced to finished some of the parts and put it together so that he could enjoy wearing it as soon as possible. There are worse problems!


Happy New Year!


Saturday, December 7, 2013

Making Christmas Tree Holiday Cards & Learning Colors While Using Fine Motor Skills

This was such a fun and easy holiday project to do with toddlers. You have to cut out the triangle, rectangle, and star for the tree and use a hole puncher to make different colored dots for the Christmas tree lights, but toddlers are pretty entertained by watching you if you talk through everything you're doing and using, not to mention taking the time to talk about the shapes and colors involved.


Placing the shapes on the card and talking about what glue is to make them stick in place is definately part of the experience. After doing one, I let my toddler use the glue stick himself, which he loved. 

You can use so many things to decorate the tree. I was trying to keep this simple, so we used glitter pens ($1 from the dollar tree) and then had fun spreading the glitter and dots around (small motor skills), and we also talked to more about colors. 

We ended up making 12 of these for Christmas cards, and you should have seen his face when we put our real Christmas tree up and decorated it. He pointed to one of the Christmas cards and then the Christmas tree in astonishment saying "Christmas tree Christmas tree," as if the cards gave him an introduction to what the Christmas tree was all about. 


Happy Holidays!

Saturday, October 26, 2013

Making Hanging Ghosts & Learning about Under and Over

Even you have to do a lot of this activity for a toddler, they have so much fun with the materials.


Let them hold the balls - all toddlers seem to love balls. Don't worry if they dig their fingers in a little, as that's only part of the fun for them, they also get to learn about texture.

After playing with the balls, wave around some cheese cloth and make a ghost noise. They will probably think you are so funny. Then tell them that ghosts hide under the cloth and show them that the ball goes under the cloth and that the cloth goes over the ball. Emphasize "under" and "over" for a fun learning opportunity, and then ask them if they'd like to try to put the cloth over the ball. You can see here, that my little toddler was deep in thought about these concepts and also having a ton of fun waving the cloth and ball around and making ghost noises.


Talk about little bit move about over and under and then ask him if he's ready to move on and give the ghosts a tie and eyes and a mouth. He'll be excited for anything new. I used black pipe cleaners for the tie, but you can use any string or ribbon as well. And I used black felt for the eyes and mouth, but again, you can use black paper, fabric, anything you might have.


Your toddler can help place the eyes and mouth, and then you can hang them up and admire them.


My toddler was still engaged at this point, and since we had all of the materials out, I asked him if he's like to make a hat. (He's obsessed with hats, since he and his dad where them all of the time, so he was willing to do another step.) I had to make the hat and explain what I was doing the whole time, while telling him that mommy has to do this point. I enticed him to be patient by saying "here comes the hat" a lot.


I put glue on the hat and let him place it on a ghost's head. And he made another one for one of the other ghosts.


Be as creative as you want. This isn't necessarily just for toddlers. I had a couple roses in my craft box and put them on the hats too to make them even more festive.


And finally, we hung them in the window, and the little guys talked about ghosts for weeks!


Saturday, October 19, 2013

Kid Crafts: Halloween Jack-o'-Lantern & Learning about Eyes, Nose, and Mouth Together

Doing crafts with toddlers is probably a lot different than doing crafts with preschools and of course older children, because you have to remember that toddlers have very short attention spans. If you don't remember that, you might fee like you're wasting time doing crafts with them. However, if you keep that in mind, you can be creative in involving them in crafts, plus, at this age, you get to help them a lot with their crafts, which I personally love, because (1), I love to do crafts, and (2), it fun to be a partner with my toddler.

In this activity, I explained to my toddler what we're going to do: "mommy is going to cut out a pumpkin, and you get to put eyes, nose, and a mouth on it to make a Jack-O-Lantern. It's a good idea to read several books about Halloween and pumpkins if you kiddo is young and doesn't really know what Jack-O-Lanterns are yet, but it's not a requirement; you can always just talk about it too.

After I cut out the pumpkin, and he fully inspected it, he watched me cut out the eyes, nose, and mouth. He of course wanted to try the scissors, which I let him try and explained their use and that they were very sharp, but which he wasn't able to use yet, so he lost interest pretty quickly.

What he was very interested in was playing with the eyes, nose, and mouth. He inspected each one; we talked about where they are on our own bodies and where they go on the pumpkin; and I encouraged him to play with them and have fun deciding where he would like them to go.


Toddlers seem to be very tactile, so he played for a while mainly touching and looking at the shapes (like two minutes). We talked about shapes, and then I asked him if he was ready to glue them down, so that they will stick in place, and he was excited. Before doing so, I helped him move them into a more realistic place while again talking about where eyes, nose, and mouth go (remember, at this age, you get to help, so feel free to jump in; they seem to love it), and then I told him about glue...


As you can see above, he was so excited when I asked him to press everything down hard, so that they would stick. Then we talked about what a stem is while I cut one out, and again, amazement. 


Finally, I asked if he'd like to color the pumpkin with markers, and he loves to color, so that was a great final step. 


We hung the pumpkin in the window, and it was a great decoration. Later we added our homemade ghosts, which I share about in another post. 


Saturday, March 23, 2013

Oil pastels are better than regular crayons for toddlers

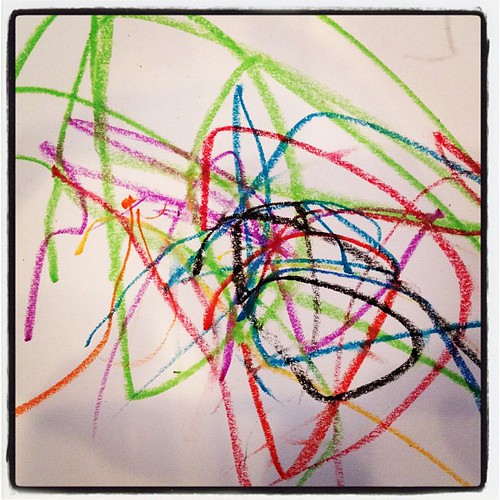
A toddler specialist (http://www.patiencebleskan.com/) suggested buying oil pastels for the younger ones to draw with, because you don't have to push as hard as crayons to get bold colors, and they were a huge success. Our 20-month-old not only created something great, he also colored longer than usual! Here's a link to the ones we bought: http://www.crayola.com/products/28-ct-crayola-oil-pastels-product/
My little Picasso loves his oil pastels. by SincerelyStacy

Monday, February 11, 2013

On 18-month-olds & language acquisition

I read an article that I think really explains the path our guy is taking with language acquisition. It states some more cautious and reserved 18-month-olds tend to wait until they understand a great deal of what they hear before actually speaking.

As long as they are pointing to things they want, to pictures in books, if they seem to understand what you're saying, use gestures and facial expressions to communicate, and grunt (yep, grunting is a sign of language development--must be part of our cave man heritage, lol), your kid should be on track.

Reading books, talking about what you see, encouraging pointing, labeling, sounded out words, etc., are all things parents can do to help develop language. Comparing to others can act as a flag to check in on research out there, but usually there is nothing wrong. The key is, with almost all milestones, that development is happening. That's what I've been learning lately.

If you feel there could be a major problem, talk with a pediatrician who may refer you to to a language development specialist, which would be covered under most insurance companies.

Here's a link to the article on Baby Center referenced above.